


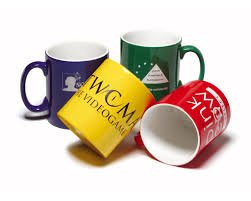
Mug sublimation printing is a great way to get your logo or text printed on drinking mugs. It’s a simple process that uses a dye sublimation printer for mugs, heat, and pressure to create a temporary vinyl coating on the mug. You can use this coating to create custom mug prints or even personalize them with your name or company logo. With mug sublimation printing, you can create high-quality prints quickly and easily at home.
You may love to read about Custom Sticker Printing.
How to do sublimation on mugs Step by Step Guide
Designing Process
You’ll need to create the art image for your mug on your computer. Use an excellent piece of photo editing software. Popular choices include Adobe Photoshop, Coral Draw, Serif- Afinity, or Gimp Design. Basic software such as MS Word, Publisher, or similar can be used, but they confine your design choices. They do not contain the features that other software offers as standard. Patterned sublimation mugs are around 11 ounces. We found a template that is 20x8cm will permit for a whole wrap design, starting from one side of the handle to the other. The 20x8cm template will allow up to 3 mug style templates to fit onto a single A4 paper.
Preparing the Mug
It is recommended to preheat your blank sublimation coffee mug to ensure heat is within the ceramic before pressing. Preheating your mug is vital for several reasons, the primary one of which is to improve the quality and consistency of transfer.
Preheating has also been shown to reduce the risk of fading to the bottom part of the mug, which is caused by the fact that ceramic is denser so it takes more time to get it heated up evenly. The preheating also helps to prevent sudden changes in temperature when the mug moves companies into the heat press. Changes in temperature can result in small cracks in the mug.
Mugs can sometimes be preheated using various methods based on the type of job we are doing. Prepress preheat your mug press the blank mug can be placed into the heat press for 30-40 seconds. The mug should warm up slightly hot to the touch but not too hot to handle.
Fill the mug with warm water, and leave it for 1-2 minutes. Then, the mug should be warm and slightly hot when handling. Fill the mugs in a large bowl of hot water for 5-10 minutes this method is great when printing large runs or bulk orders. Identify the mugs, then, and then dry them before pressing.
Print and Prepare Design
Lay down a 20x8cm transfer on paper and then trim it to the two-meter width with several pairs of scissors. Wrap the transfer entirely around the exterior of the mug, starting from the left and finishing at the right one. Secure the paper wrap in place with heat tape. It should be tight against the mug’s surface to prevent wrinkles from developing when it is placed in a heat press.
Pressing the Mug
Typically, a 10oz sublimation mug is manually squashed at a firm strain for around 170 seconds (3 minutes) at temperature 180 degrees Celsius. The pressure and temperature vary from mug to mug, so make sure to consult with the manufacturer or your supplier prior to using any particular 11 oz sublimation mugs. For this example, we utilize a set of our own 11 oz sublimation mugs. We recommend these mugs are gently squashed at temperatures of 180 Degrees Celsius for 170 seconds.
Step by Step Process
We generally recommend this specific procedure; Turn on your mug heat press. Set the temperature and time. Allow the machine to come up to temperature with a blank sublimation mug in the press (so that the heating cover doesn’t wear out unduly).
When correcting the temperature and heat penetration in the mug, remove the blank mug, and place a wrapped mug on top of the printed design. Preheat your mug in accordance with the directions in Preparing Your Mug. Close the heat press clamp. Start the timer for 180 seconds. When the timer goes off, remove the mug from the press and set it on a cooling rack or heat-resistant mat.
Tips and Tricks
Try to place your design away from the edges of your mug. We usually try to keep motorbikes from 5 to 10 mm away from all edges of one of your mugs. This is due to the fact that mugs usually have a slight taper on top and bottom, and pressure from the water temperature press is uneven in these areas. In addition, the heating element in the heat of the press is generally weaker on the edges.
As a result, you’re more inclined to warm up in these zones. To pre-heat the coffee mug for certain types of jobs, we require 3 different techniques: Prepress Preheat it in the mug press the blank mug must be placed on the metal plate for 30-40 seconds. The mug should warm slightly warm to the touch, but it’s not hot to handle.
Bring a mug of water to a boil and leave it to cool down for 1 to 2 minutes. Again, the mug should be slightly hot when handling. Place the mugs in a large bowl of hot water and let them stand for 5 to 10 minutes, this method is useful for large orders or mass production. After soaking, remove the mugs and dry them prior to pressing.