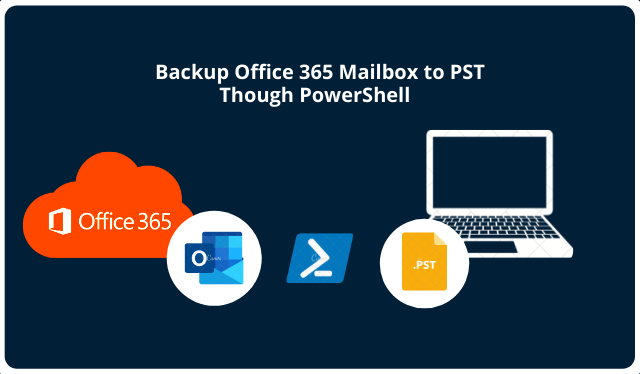
Backup Office 365 Mailbox to PST Though PowerShell & Automated Solution
This article provides two proven ways to backup Office 365 mailbox to PST without any data loss. Users seeking the same can go through this write-up to get a productive solution by the end of this guide. However, before getting into the step by step solution, let’s have a quick glance at the user query: User Query: Hey Everyone, I have a client that urgently requires a bunch of mailboxes backed up from Office 365 to PST file format for compliance reasons. I am looking to find a way or third-party professional software. By which that I can back up the user’s mailboxes to PSTs without getting into technical. What do you use/recommend? I would also like to know the manual approach, whether I would be able to perform this operation through PowerShell or not. Thanks in Advance. As it is quite evident from the above user query that the user wants both the approach for
How to Backup Office 365 Mailbox to PST through PowerShell?
Users can use PowerShell cmdlet scripts to perform this operation. However, this approach can be technical and tedious at the same time.
And a minor error in these scripts can result in multiple errors. In order to run these scripts, users must have admin permission as well as enough technical expertise at the same time.
Let’s discuss the step-by-step procedure to accomplish this task using PowerShell Scripts. For this we will take an example, we have two user accounts the source – oldaccount@example.com and the destination where we will backup all the emails of source accounts – newaccount@example.com. Here let’s assume the admin account is hr_admin@example.com. Now keeping this scenario in mind let’s discuss the process for the same.
Follow the Below-Listed Steps Carefully to Backup Office 365 to PST using PowerShell Scripts
Step 1. In the very first step, you have to launch the connection using PowerShell through MS Exchange Server.
In order to initiate this operation run these scripts in PowerShell:
“$UserCredential = Get-Credential”
Now after running this script you have to provide the credentials of Office 365 such as username & password. Which is given in the Windows PowerShell credential request Pop up box. In this stage, you have to provide the admin credentials of hr_admin@example.com in the displayed dialog box.
Now, run the below PowerShell script:
“$Session = New-PSSession -ConfigurationName Microsoft.Exchange -ConnectionUrl https://outlook.office365.com/powershell-liveid/ -Credential $UserCredential -Authentication Basic –AllowRedirection”
After this, you have to run the below-mentioned script to backup Office 365 mailbox to PST.:
“Import-PSSession $Session”
Step 2: Here You have to Grant Access to the Mailbox to Backup Office 365 Mailbox to PST through PowerShell
Here, this example will grant oldaccount@example.com full access to newaccount@example.com mailbox:
“Add-MailboxPermission – User newaccount@example.com -Identity oldaccount@example.com -AccessRights FullAccess -InheritanceType All”.
Step 3: After all this, now launch the Outlook user profile for the new account.
Here you will have to open the MS Outlook as newaccount@example.com & also make sure that oldaccount@example.com must be available in the mailbox in the left pane. Now you have to wait for few seconds. As the permission can take few seconds to few minutes to get applied.
Step 4: In this step, you should check the MS Outlook Configuration Settings.
In order to verify whether Outlook is ready to download the emails of Office 365 in a limited period of time. Then follow the below steps:
Click File Menu option then >> Info Page then go to >> Account Setting >> select account.
Now, click the change button and make sure that, Use cached Exchange Mode selection is enabled.
Step 5: Now in this step Backup Mailbox to PST though Import/Backup
Now you have to open Import/Backup in order to backup oldaccount@example.com to PST file format. Then, click >> File Menu >> Open & Backup >> Import/Backup option.
After all, this, choose Backup to a file from the given menu and press Next. Then, select Outlook Data file format (PST) and hit the Next button to backup Office 365 mailbox to PST.
For the understanding perspective let’s choose the oldaccount@example.com from the given list and hit the Next button. Also, keep in mind to select the Subfolder’s checkbox.
Now assign a new name to the respective file and also assign storage location to save the PST files such as: c:tmpoutlook-archive- oldaccount@example.com -20160209.pst.
Also read: Migrate OneDrive Data from One Tenant to Another – Perfect Explanation
Then, you have to choose either do not backup duplicate items or Replace duplicates with items backed up option under the Options section. Then in order to backup Office 365 mailbox to PST file format hit the finish button.
Now you have to enter the password for the respective PST file, if asked, or leave it blank. Then hit the OK button and proceed further. Outlook will still remain out of action until the whole backup operation is going on. Hence, you have to wait in order to gain control in assessing the file.
Step 6: Check the Backup process status as it should successfully completed now.
In this step, you can manually verify whether the data backed up is the same or not. In order to check it you can check and compare the source mailbox data size and the destination PST data file size.
Once you have backed up the mailbox data to PST then you must need to remove all the respective permissions that were assigned previously via PowerShell. In order to do this follow the below script:
“Remove-MailboxPermission -User newaccount@example.com -Identity oldaccount@example.com -AccessRights FullAccess”
Step 7: Lastly you need to close the PowerShell session.
In order to close the PowerShell sessions run this below-listed command:
“Remove-PSSession $Session”
Now, if you have followed all the above steps carefully without missing any minor codes or steps then, you have successfully backed up Office 365 mailbox to PST format.
Now, if you are a novice and non-technical user of Office 365 then you must be overwhelmed by going through the above-mentioned PowerShell scripts. Don’t worry we have the most reliable alternative solution for this operation. Let’s discuss the same incoming section.
Automated Way to Backup Office 365 Mailbox to PST without Any Technical Expertise
Users who are not having prior technical expertise or are not familiar with PowerShell scripts. Then it is suggested by major IT experts to use the Office 365 Backup & Restore Tool for this operation over the manual PowerShell approach. You can easily backup the O365 mailbox to PST with 100% data security and integrity.
Use the Free Demo Version
This utility offers users a free version for trial purposes. Users can download this utility and they just only need to activate this software by signing up and they will get a free demo version. Users can self verify the working and performance of this tool at no cost. Moreover, they can use this version to backup 2 Office 365 accounts for free.
Bringing It All Together
Users with technical expertise can backup Office 365 mailbox to Office 365 with the manual approach. However, the manual approach is not a guaranteed solution for this operation. Minor errors in codes can result in various errors and accidental data loss.
Therefore, it is suggested to use the automated software as mentioned above, moreover, users with zero technical knowledge can also perform this operation with 100% data security and integrity.
It is an effective tool to export Office 365 mailbox to PST and 2 other file formats. Moreover, this tool is also compatible with the latest version of Windows OS including犀利士 Windows 10.


canadian drugs online
http://expresscanadapharm.com/# Express Canada Pharm
canadian online pharmacy
Everything about medicine.
can you get generic clomid no prescription
Quick turnaround on all my prescriptions.
Always stocked with what I need.
where to buy cytotec no prescription
Their international health advisories are invaluable.
Their private consultation rooms are a great addition.
where to buy generic cytotec without a prescription
Always attuned to global health needs.
Their medication reminders are such a thoughtful touch.
where can i get lisinopril without dr prescription
Get here.