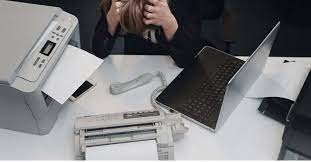
Printer problems are common. The Epson printer has many common problems, just like other printers. The “printer not printing” problem is one of the most common.
You may find that your Epson printer is not printing correctly when you try to print documents. It prints half the pages without printing color, or it doesn’t print at any point.
This happens mainly if the driver for your printer is corrupted. This is a common problem that can be easily fixed. For immediate assistance, you can contact the best printer repair service in Dubai.
Why is my Epson printer not printing?
It is important to understand the root causes of the problem before you can move on to the solution.
This will hopefully help you find the right answer to the question “Why is my Epson printern’t printing correctly?” It will not happen again in the future.
Here are some common causes of this problem.
- Connect loosely
- A version that is not current.
- Windows Firewall and third party security software.
- The print spooler service has been stopped.
Solutions for Epson Printer Not Printing
This article will explain how to fix an Epson printer that isn’t printing correctly. These solutions can be followed step-by-step until the problem is resolved.
Solution 1 – Turn the system into safe mode
You can also fix the problem of Epson printer not printing by turning the device on in safe mode. These steps will assist you:
- Click on the Power icon and press the Start button.
- Press the Shift key from the keyboard and select the Restart button.
- The Choose an option window will open when the system restarts.
- Choose Troubleshoot, then select the Advanced options.
- Click on Startup Settings in the Advanced Options window. Windows will now prompt you to restart the system. Press the F5 key to activate Safe Mode with Networking.
- The system will now go into safe mode. To verify if the problem persists, print any documents after restarting your device.
These solutions will help you get rid of your Epson printer not printing problem without much hassle. These steps can be performed on your device immediately if you carefully follow them. If none of the above steps work, you can call the Printer Experts to resolve your Epson printer problem.
Problems with printers are quite common. Epson printers also have common issues, as with other printers. Printer not printing is the most common problem.
If you attempt to print any documents using the Epson printer, it may not print correctly. The Epson printer prints half of the pages or none at all when you try to print them.
This is most common if your printer driver is corrupted. This is a common problem and it can be fixed easily. Get instant assistance from the best printer repairs services in Dubai.
Solution 2 – Run Printing Troubleshooter
This issue can be solved by running the printing troubleshooter. These are the steps you should follow:
- Click on the Start button, then click the Settings icon.
- Double-click the Update & Security section in the Settings window.
- Click the Troubleshoot tab in the left panel.
- Scroll down until you reach the Printers and Devices section. Click it to select.
- Next, click on Run the troubleshooter.
- After the troubleshooting is completed, restart your device to check if the problem has been resolved.
Solution 3: Reinstall the Epson Printer driver
A corrupted printer driver could be the cause of “Epson printer not printing clear” error. It is best to remove the printer driver and then reinstall it. These are the steps to fix this problem:
- Click the Windows Home button to open the Device Manager.
- Find the Print queues section in the Device Manager window and select it to expand.
- Right-click the Epson printer driver to select the Uninstall option.
- After the uninstallation is complete, restart your computer and then install it.
- You can download the Epson printer driver from the official Epson website.
- Once you have downloaded the file, make sure to install it correctly.
- After the installation is completed, reboot your device and then you can print.
Solution 4: Update the Epson Printer Driver
It is essential to ensure that your driver is up-to-date in order to prevent this from happening. These steps will assist you:
- Start the Device Manager window.
- Open the Device Manager window and locate the Print queues section. Click on it to expand.
- To start the process, right-click the Epson printer driver.
- Restart your computer after the update is complete. Next, check to see if the problem has been resolved.
Solution 5 – Perform a Power Cycle
A power cycle is one of the easiest ways to solve Epson problems on your computer. These steps will help you do this:
- To turn off the Epson printer, press the Power button.
- All cables should be unplugged from the printer, as well as the system/network.
- Give them a moment to rest before re-connecting.
- After you’re done, press Power to turn on your Epson printer and network. Next, print to verify that the printer is working properly.
Solution 6: Verify that the printer is compatible with your system
If the Epson printer does not work with your system, you might have problems printing and get the “Epson printer not printing correctly” error message on your computer. These are the steps to learn more:
- Select the Control Panel by pressing the Start button
- Navigate to the Hardware and Sounds section once you have landed in the Control Panel window.
- You will find the Devices and Printers section in that section. You will see all of the printers and devices listed here.
- Under the Unspecified section, locate the Epson printer. You can print if the printer is present.
Solution 7: Restart the Print Spooler Service
You may encounter the error “Epson printer is not printing anything” when the Print Spooler service stops running. You can restart it using the following steps:
- To launch the Run box, press the Win + R buttons together.
- Type services.msc, then hit Enter or press the Enter key.
- Right-click the Print Spooler option in the Services window.
- Next, click on the Start button.
- Next, right-click it and choose Properties from the list.
- To save your changes, click on the OK button and set the Startup type to Automatic in the Properties window.
Use the Windows Update:
- To open the Start menu, first go to it and then tap on it.
- Next, click on the Search box in the Start menu.
- In the search box of the Start menu, type “Device Manager” Click on the Search button. To move on, you can also press the Enter key on your keyboard.
- Next, click on the Device Manager option in the search results.
- To continue, enter the administrator password.
- Expand the Printers option. Find the printer you’re using from the list. If your printer is not listed, try installing it again.
- Next, select the option “Update driver”.
- Finally, click the button “Search automatically to update driver software” in Update Driver Menu.
Download the driver for your printer device at the Manufacturers Official Site:
If Windows Update fails to locate the correct driver for your printer, there are alternatives.
- First, you will need to open a web browser. Next, open a web browser on the system to access the official website of the printer.
- You can then try any web browser you like. You can use Mozilla Firefox, Google Chrome, and many other web browsers.
- Go to the Support tab of the website and open the support page for the printer.
- Enter your printer model name into the printer support tab. Then, click on the List of Printer Models to select your model name.
- Select the System type. Choose the driver that is compatible with your printer device.
- Double-click the driver once it is downloaded. To complete the driver installation, click on Next and follow the prompts.
Final Outcome…
That’s all! These are the best and fastest troubleshooting tips to get rid of the “printer error code 0x803c010b” in a flash.
If you have any problems with the solutions or if none work, your printer may be experiencing more serious issues that require professional assistance.


Very interesting info!Perfect just what I was searching for!Expand blog